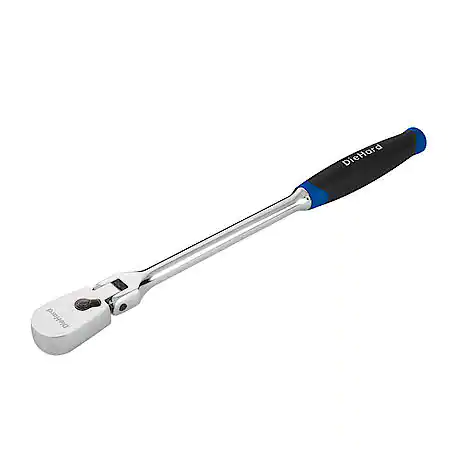
A ratchet is the go-to tool for installing or removing nuts, bolts, and other fasteners. So, whether you are fixing a vehicle, doing home maintenance, or building furniture, there’s a good chance you will need to learn how to use a ratchet sooner or later.
Like most hand tools, ratchets are simple. Basically, you attach an appropriately sized socket and you’re ready to go. There are a few things you’ll need to understand to use one properly, however. And that’s where this guide comes in.
To avoid any confusion, let’s kick things off by taking a look at the components of a ratchet. Then we’ll move into actually using one and wrap up with some tips.
Components Of A Ratchet
Handle
A ratchet’s handle is the part that you hold on to – pretty simple, right? In most cases, the handle is made from forged steel. After forging, it is machined in to shape, stamped, and heat treated before receiving a finish like chrome.
Ratchet handles are made in various shapes. They can be made relatively smooth shape like the ratchet shown here. They can also be knurled or given a rubber grip for better comfort and grip.
Head
The handle extends naturally into the head. The head is made in the same way the handle is made but receives additional machining to accept the ratchet’s internal components. You may run across a few different head types. The most common are pear-head and round-head.
A selector switch on the back of the head can be actuated to change the direction of rotation.
Quick release ratchets will have a button on the back of the head you can press to release the socket when attached. Non-quick release ratchets will obviously not have this button, and, instead, be smooth.
Anvil
The anvil is the square portion, to which you attach a socket. It has a ball detent machined into the side to hold the socket securely. If equipped, there is a button on the back of the ratchet that, when pressed, will release the socket.
Internal Components
Inside the ratchet head are various components that allow the ratchet to move in one direction or the other depending on the position of the selector switch.
Though manufacturer dependent, most ratchets typically include a gear, pawl, springs and ball bearings.
What You’ll Need
Equipment / Tools
- Ratchet
- Socket
Materials
- None
Instructions
Select The Right Size Ratchet And Socket
Some people can eyeball a fastener and tell you the exact size needed to install or remove it. For us mortals, however, we’ll need to grab a few sockets and test them out. Simply place your socket over the fastener. If it doesn’t fit move up to the next size until it does. Likewise, if it fits but is extremely loose, go down a size until it first snugly.
Once you have the right size socket, select the appropriate ratchet. The square on the socket will fit one drive size only – typically 1/4″, 3/8″, or 1/2″.
Attach The Socket To The Ratchet
Once you’ve selected the right size socket and ratchet, you will need to attach the socket to the ratchet itself. Simply match up the square drive side of the socket to the anvil, push in the quick release button, push the socket on to the anvil, and release the quick release button.
Some ratchets do not have a quick release feature. In which case, you simply push the socket onto the anvil without depressing a button.
Install Or Remove The Fastener
Using the selector switch, choose the direction of rotation. Turning clockwise will tighten the fastener, turning counterclockwise will loosen it.
Place the socket on the fastener and begin turning the ratchet. You’ll notice that it turns freely in one direction and lock up in the other. The direction of lockup is the direction the fastener is spinning.
Once the fastener is installed or removed you can remove the ratchet and socket.
Remove The Socket From The Ratchet
Once you’re done, simply remove the socket by pressing the quick release button and pulling it off. If not equipped with a quick release, you can pull the socket off with a bit of effort.Return the ratchet and socket to their respective places and you’re done.
Tips For Using A Ratchet
- Use the correct size socket for the fastener. One that is too loose will will damage the fastener and socket
- Use the right size ratchet for the job. For example, large, stuck-on fasteners or fasteners that require a lot of torque do not lend themselves well to small ratchets. You risk breaking your ratchet
- If you don’t have the correct size ratchet or you need more reach, adapters and extensions are available
![Different Socket Types [And What They’re Used For]](https://newtoolday.com/wp-content/themes/mts_sociallyviral/images/nothumb-sociallyviral-featured.png)

No Responses